Beyond Basics: Advanced Techniques with Sheepsfoot Compaction
Let’s be honest, working with stubborn clay and heavy, sticky soils is no walk in the park. If you’ve spent any time on a dirt site, you already know that hitting your compaction specs isn’t just about ticking a box for the site inspector. It’s the only thing that keeps the whole project from sinking into a cracked mess a few years down the line. That’s exactly where the sheepsfoot compaction roller earns its keep.
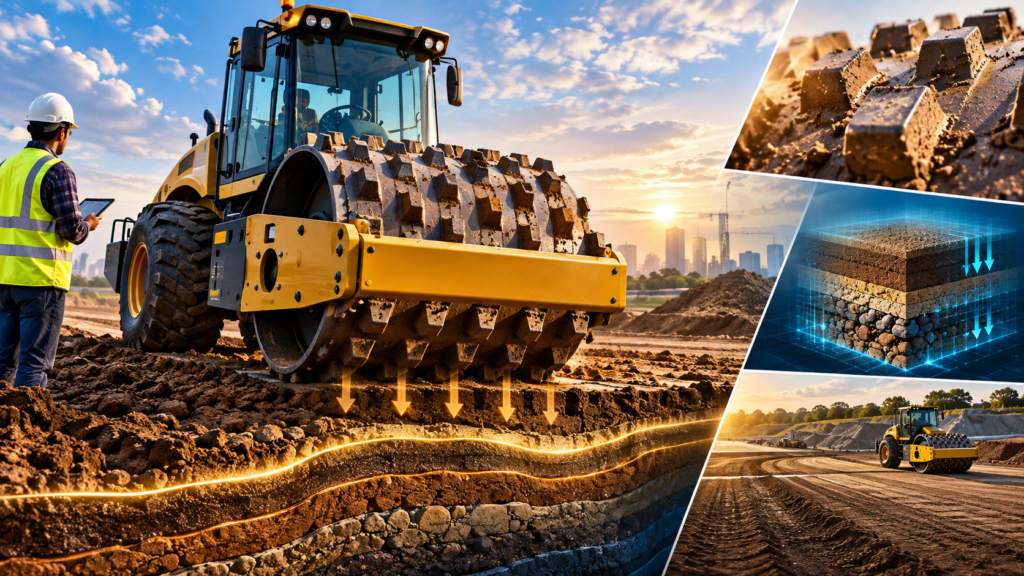
We’re not talking about those smooth drum rollers that just iron out the top layer like a freshly pressed shirt. A sheepsfoot actually digs in. Its chunky, studded drum punches straight through cohesive soil, crushing clods and squeezing out hidden air pockets from the bottom up.
But here’s the reality check: just driving this massive piece of iron back and forth across a pad isn’t enough anymore. If you want a foundation that actually lasts, you have to move past the basic back-and-forth routine. We need to talk about advanced sheepsfoot compaction techniques.
Mastering this means getting smart about your soil moisture, nailing your pass sequences, tweaking your machine setups, and using modern tech to your advantage. Let’s break down exactly how you can get the absolute most out of your heavy equipment on the next job.
Nailing Your Lift Staging and Rolling Patterns
You can have the best heavy equipment in the world sitting on your site, but if you’re dumping massive piles of dirt and trying to roll it all at once, you’re just asking for trouble. Doing that means your roller’s feet can’t dig deep enough into the material. You end up with a rock-hard crust on top and a soft, spongy mess hiding underneath.
The real trick here is precision lift staging. You want to lay down the soil in tight, consistent layers. When you do this right, the heavy lugs on the drum punch all the way through the fresh dirt, packing the layer below while intentionally leaving the top surface completely churned up.
Why leave it looking messy? Because that loose, chewed-up top layer acts like velcore for the next batch of dirt to grab onto, creating a seamless bond. Then, you’ve got to think about your driving pattern. Don’t just wing it or let the operator drive aimlessly. Start with straight, overlapping passes to cover the area, and follow up by rolling diagonally. This grid-like approach makes sure the whole pad gets hit with the exact same amount of force, leaving zero soft spots behind.
- Keep your dirt lifts tightly controlled at about 6 to 8 inches—this lets the drum’s feet punch all the way through for proper bottom-up packing.
- Don’t worry about leaving the top layer looking chewed up after a pass; that rough texture is exactly what you need to physically bond with the next layer of dirt.
- Stick to a strict rolling pattern, moving from overlapping straight runs to alternating diagonal passes, so you don’t miss a single inch of the subgrade.
Why Moisture Timing is Absolutely Everything
Talk to any seasoned dirt guy, and they’ll tell you the exact same thing: water makes or breaks your compaction. Cohesive soils like heavy clay are incredibly fussy about moisture. If the dirt is too wet, bringing a heavy roller in will just turn the site into a giant mud pit.
The machine slips, the dirt slides around instead of packing, and you end up with a spongy base that’ll definitely settle later. On the flip side, if it’s bone dry, the soil particles just grind against each other.
The drum can’t knead the dirt properly, which basically wastes your fuel and time. You have to find that sweet spot. That usually means pulling a Proctor test in the lab first so you know exactly what moisture target to hit. Out on the job, you’re looking for a texture that feels damp but definitely not soggy. And honestly, timing your rolling passes makes a huge difference.
A lot of pros aim for mid-morning to get their heavy passes done. By then, the heavy morning dew has burned off, but the harsh midday sun hasn’t baked all the usable moisture out of the ground yet.
- Always lean on a proper Proctor test before you start rolling so you know exactly how much water your specific soil actually needs to pack tight for every roller.
- Aim for a “damp-but-not-wet” consistency out on the pad to keep your roller from slipping and to prevent future foundation sinking.
- Try to knock out your heaviest compaction work in the mid-morning when the natural ground moisture is just about perfect for heavy clay.
Tweaking Your Gear for the Job at Hand
One of the biggest mistakes an operator can make is just accepting the factory default settings on their compactor. Implementing advanced sheepsfoot compaction techniques means customizing your rig to fit the dirt you’re actually sitting on. The physical shape of the feet on your drum completely changes how the machine transfers its weight into the ground.
If you’re dealing with deeply cohesive, stubborn clay, you might need sharper peg feet to really slice and knead the material apart. But if you’re trying to seal up the final top layer, broader pad feet usually do a much better job. It’s also worth looking at vibratory models. Static rollers just use their sheer dead weight. It works, but it’s slow.
Flipping on the vibration sends high-frequency shockwaves deep down into the soil. It basically shakes the dirt particles into place while the heavy drum packs them down, meaning you hit your density numbers a lot faster. On top of that, don’t be afraid to adjust your drum spacing and carefully plan how much your passes overlap to keep the pressure totally even.
- Pay attention to your footprint overlap and drum spacing to avoid leaving hidden soft spots buried deep underground.
- Switching on vibratory mode sends powerful shockwaves into the soil, packing the deeper layers way faster than just rolling with static dead weight.
- Swap out your drum feet based on your goal—use sharp pegs to chop up stubborn clay, and switch to wider pad feet to seal off the final surface layer.
Watching the Data in Real-Time
Back in the day, operators just rolled until the dirt “looked” done or felt hard enough under their boots. We really can’t afford to play those guessing games anymore, especially on commercial pads. Today, hitting your numbers means relying on real, hard data while you’re still sitting in the cab.
Sure, field crews still use nuclear density gauges and old-school sand cone tests to check the work against the lab specs, and that’s still super important. But the real game-changer is intelligent compaction technology. A lot of modern rollers come wired with GPS mapping and moisture sensors right on the dashboard display.
This lets the operator see exactly which spots are packed tight and which areas need another pass, all in real time before the next lift gets dumped on top. And let’s not forget about the operator’s gut feeling. A good operator knows the exact moment a lift is finished because the machine physically tells them.
When the soil is tight enough, the roller will “walk out” of the dirt. Instead of sinking down into the mud, the machine lifts up and rides smoothly on the very tips of the feet. If you’re still bouncing around and cutting deep ruts, you’re simply not done yet.
- Keep your field testers busy with nuclear gauges and densometers to prove your dirt actually matches the lab’s Proctor numbers.
- Use dashboard GPS and density sensors to spot loose patches immediately, saving you from having to dig it all up and fix it later.
- Listen to your machine; when the roller “walks out” and starts riding smoothly on the feet, you know that layer is properly locked in.
Mixing Up Your Tactics for Weird Soil Blends
Anybody who has been moving dirt for a few years knows that no two job sites are ever exactly the same. You have to be ready to adapt on the fly. Let’s say you’re dealing with heavy clay; you’re going to be doing a lot of static, repetitive kneading just to break down the chunks and get the air out. But if you hit a vein of fine silt, that stuff usually locks up much faster under the heavy weight of the drum.
Things get really interesting when you hit mixed dirt—a messy blend of clay and silt. That’s when you have to start using hybrid methods. You might run a few static passes to knead the clay, and then hit it with a heavy vibratory pass to shake the silt into place. You also need to think about what happens after you shut the machine off for the day.
Don’t just immediately start throwing gravel or paving over the dirt. Give the soil a little breathing room to dry out and cure. After it sits for a bit, a quick, light pass with a motor grader will give you a beautifully smooth surface that’s ready for whatever comes next.
- Read the dirt in front of you—plan to knead heavy clay over and over, but expect silt to pack down a lot quicker.
- When dealing with mixed soils, try alternating between heavy static rolling and strong vibratory passes to get the absolute best of both worlds.
- Always build in a little curing time after you’re done rolling so the soil can dry out before you run a grader over the top to smooth it out.
Smart Scheduling and Crew Teamwork
You can have the best machines in the county and perfect dirt, but if your site logistics are a mess, your roller compaction is going to suffer. Just driving a roller in circles without ever stopping is actually a pretty bad idea. It wears out your operator, burns a ton of fuel, and doesn’t give the soil time to react to the pressure.
The smarter play is to use staggered rolling schedules. Build intentional pauses into your day. When you let the freshly rolled dirt sit for a little while, it naturally releases built-up water pressure, which actually helps the soil lock together tighter when you roll it again. To pull this off without wasting time, you really need a two-crew system.
Have one crew focused entirely on prepping the next lift and checking the moisture, while the other crew stays in the iron, making the passes. It keeps the machines moving only when they need to be.
Also, keep an eye on the thermometer. When the temperature drops, clay gets insanely stiff and hard to work with. If it’s a cold morning, you’re probably going to have to run the vibrator harder and add a few extra passes just to hit the exact same numbers you would on a warm, sunny afternoon.
- Build short drying breaks into your rolling schedule—it helps the dirt release trapped water pressure and pack significantly tighter.
- Split your crews up so one team manages the dirt piles and moisture while the other stays in the cab, keeping the overall workflow moving.
- Watch the weather closely, because cold temperatures make clay incredibly stiff, meaning you’ll definitely need extra passes to get the job done.
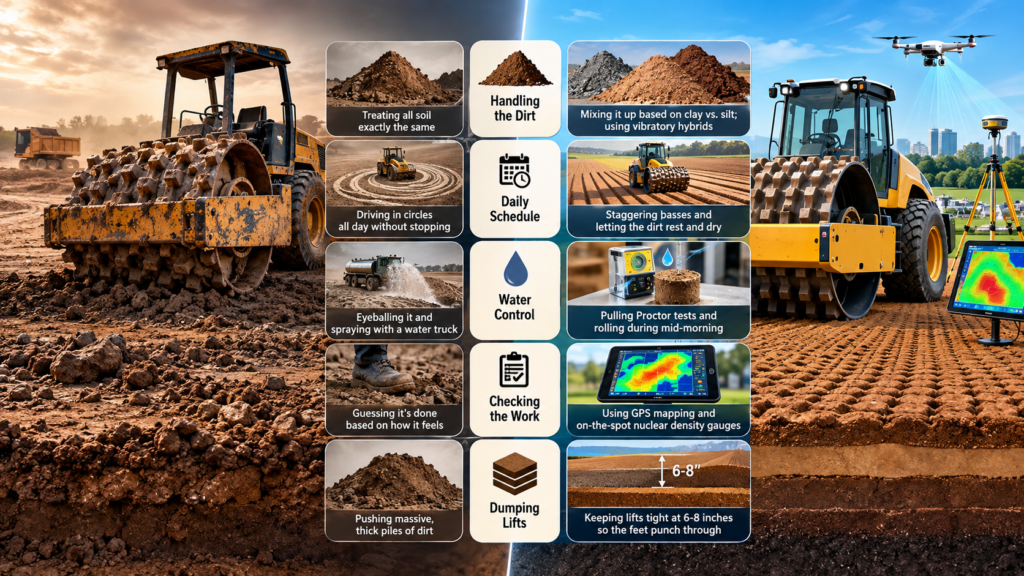
Snapshot: Old School vs. Advanced Sheepsfoot Compaction
| What We’re Looking At | The Old School Way | The Advanced Method |
| Handling the Dirt | Treating all soil exactly the same | Mixing it up based on clay vs. silt; using vibratory hybrids |
| Daily Schedule | Driving in circles all day without stopping | Staggering passes and letting the dirt rest and dry |
| Water Control | Eyeballing it and spraying with a water truck | Pulling Proctor tests and rolling during mid-morning |
| Checking the Work | Guessing it’s done based on how it feels | Using GPS mapping and on-the-spot nuclear density gauges |
| Dumping Lifts | Pushing massive, thick piles of dirt | Keeping lifts tight at 6-8 inches so the feet punch through |
FAQs on Sheepsfoot Compaction
What is a sheepsfoot roller actually best used for?
You’ll mostly see sheepsfoot rollers used for deep compaction on cohesive soils—think heavy, sticky wet clay and fine silt. They are the absolute go-to machine when you need to build a rock-solid foundation for a highway subgrade, an earth dam, or a big commercial building pad where settling is not an option.
How do I actually know when I’m done rolling a section?
The machine will literally tell you. When the soil is tight enough, the roller “walks out.” The drum stops sinking into the dirt, and the machine starts riding smoothly on the tips of the feet. For the paperwork side of things, you’ll still need guys out there with a nuclear density gauge to prove it hits the lab numbers.
Can I use a sheepsfoot on gravel or loose sand?
No, keep it away from sand. Sheepsfoot rollers are built specifically for sticky, cohesive dirt. If you run one over loose sand or gravel, the feet will just churn the material up like a rototiller instead of packing it down. You need a smooth drum roller for the granular stuff.
What’s the real difference between static and vibratory models?
A static roller just uses its massive dead weight to crush the soil. It works, but it takes a while. A vibratory roller has a mechanism inside the drum that shakes violently, sending kinetic shockwaves into the ground. That vibration helps settle the dirt much faster, meaning you get deeper compaction in fewer passes.
How thick should my dirt layers be?
Don’t get greedy. Keep your dirt lifts at about 6 to 8 inches (around 150-200 mm). If you go much thicker than that, the feet on the drum can’t reach the bottom of the pile, and you’ll end up with a soft layer hiding underneath a hard crust.
Why does a sheepsfoot pack from the bottom up?
Because those long metal feet punch right through the loose dirt on top and squeeze the dirt at the bottom of the lift first. As you keep rolling, it packs upward, leaving the very top layer a bit chewed up. That rough top is actually perfect because it grips the next layer of dirt you dump on it.
Should I always use the vibratory setting if I have it?
Usually, yes. Adding that vibration to the heavy kneading action of the sheepsfoot gets you a much higher soil density. It makes the foundation a lot more stable in the long run and saves you a ton of time because you don’t have to make nearly as many passes.
Sheepsfoot Compaction Techniques Final Say
Getting your dirt right takes a lot more than just handing a guy the keys to a machine and telling him to drive. By actually using advanced sheepsfoot compaction techniques—like watching your lift sizes, timing your moisture perfectly, and trusting the data on your dashboard—you can build pads that won’t ever sink. Keep up with these methods, and your equipment will run better, your sites will pass inspection the first time, and you’ll stay right on schedule.