Complete Guide to Road Roller Machines: How to Use Them for Perfect Road Construction
Have you ever thought about how roads become so even and compact? The tool used to achieve this is called a road roller machine. No matter if your project is a driveway, parking area, or road, knowing the correct method of using a road roller can be the factor that makes the first surface still good after ten years, while the other one gets cracks after only a few months.
I will explain to you all the details that you have to know when using this important heavy equipment.
What is a road roller machine?
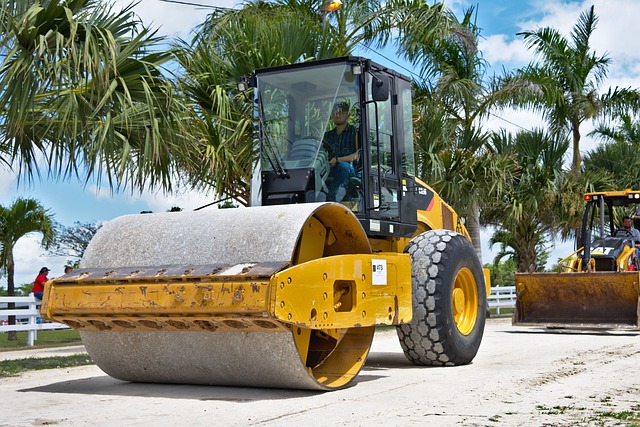
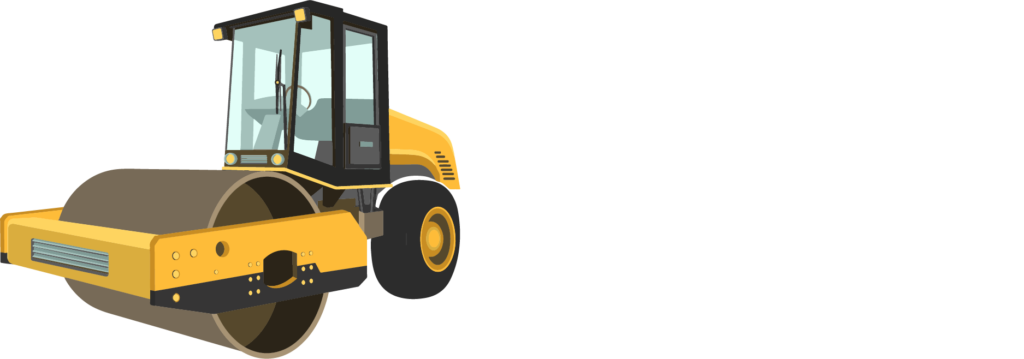
A road roller (also named a compactor or steamroller) is a heavy engineering machine, which is used to press asphalt, soil, gravel, or concrete in the process of road making. Simply put, this is a huge metal thing that flattens and compacts the earth or any other material to make a firm and long-lasting surface.
There are various sizes and types of these machines, such as a tiny vibratory roller for a home driveway and a huge three-wheel roller for a road.
Step 1: Choose the Right Type of Road Roller
One thing that you should do before starting your engine is to choose the correct roller for your job. These are the ones that you can choose from:
Smooth Wheel Rollers: Are the best choice when it comes to asphalt compaction and finishing work. They are the ones that produce the smooth surface that you see on highways.
Pneumatic Rollers: Have rubber tires instead of steel drums. Pneumatic rollers are the best choice for asphalt sealing and creating a watertight finish.
Vibratory Rollers: Generate the vibration that leads to materials being compacted more efficiently. They are the best choice when it comes to soil compaction and granular base layers.
Tip from the field: A single-drum vibratory roller of 1-3 tons will most likely be the right choice for any residential paving project. If you use a machine that is too large, you will be risking the damage of the subgrade.
Step 2: Inspect Your Road Roller Before Operation
Safety first! Never skip your pre-operation inspection:
- Engine oil, hydraulic fluid, and fuel should be checked for their levels.
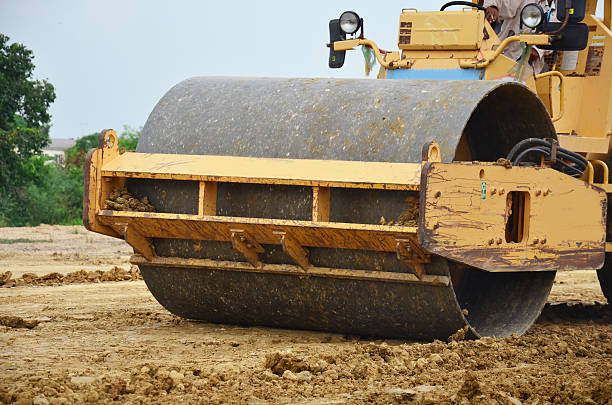
- The drum should be checked for any kind of damage, debris, or buildup.
- Checks should be made on all the controls, brakes, and steering through testing.
- It should be confirmed that the water spraying system is working (it is used for preventing the sticking of the asphalt).
- The area should be checked for any leaking hydraulic fluid and for loose bolts.
- Tire pressure should be checked on pneumatic rollers.
Real-world tip: Keep a checklist in the cab. One operator I knew skipped checking hydraulic fluid and ended up with a $3,000 repair bill when the system overheated.
Step 3: Prepare the Surface Area
Your roller is only as good as what you’re rolling over:
- Clear the area of work of any debris, rocks, and loose material
- Make sure the base layer is not only properly graded but also leveled
- Inspect the drainage slope for correctness (usually, a 2% grade minimum)
- Ensure that the material thickness meets the required standards.
- Don’t forget to check if the surface temperature is right (asphalt for compaction should be 175-225°F)
Real-world tip: Use an infrared thermometer for asphalt work. Rolling too cold means poor compaction; too hot and you’ll displace the material.
Step 4: Start with the Proper Rolling Pattern
This is where experience really counts:
For Asphalt Paving:
- Rolling should be done from the outer edges to the center
- Initially, carry out static (non-vibrating) operations on the surface of the hot asphalt
- Each of your passes should overlap the previous ones by 6–8 inches.
- Make your first pass within 10 minutes of paving when the material is still hot
For Soil Compaction:
- Begin at the lowest point and move to the highest
- Turn the vibration on with the very first pass.
- On granular materials, overlap by at least 12 inches
- Try to work in straight lines as much as possible
Real-world tip: Always keep moving. Stopping on fresh asphalt creates depressions that are nearly impossible to fix later.
Step 5: Use the Right Compaction Technique
Here is how you can achieve maximum density:
Speed Matters: You should keep your roller moving at a speed of 2-3 mph for asphalt, and for soil, it should be slightly faster (3-5 mph). If compaction is too fast, you won’t get the right density; if too slow, you may push the material.
Number of Passes: Asphalt generally requires 3-5 passes, while soil may need 4-8 depending on the thickness of the lift. With each passing, density should increase by 2–5%.
Vibration Settings: High amplitude should be used for granular soils and base layers, and low amplitude for thin lifts and structures.
Tip from the real world: You should test your compaction by means of a nuclear density gauge or a proof roller. I have seen contractors having to redo entire parking lots because they thought that they had achieved the proper density without testing.
Step 6: Pay Attention to Problem Areas
Certain spots need extra care:
Edges and Joints: After placing the material, firstly, roll the longitudinal joints. Along the edges where the material is less confined, make 2-3 additional passes.
Near Utilities: To avoid causing damage, decrease or remove the vibration that is happening within 10 feet of underground utilities, building foundations, or manholes.
Transitions: Be additionally careful when the new pavement is going to the old one to ensure the proper bonding and that the elevation is matching.
Real-world tip: Always have a hand tamper or a plate compactor ready for the tight corners and areas where your roller cannot reach. These places are the spots of failure if you remove them from your consideration.
Step 7: Monitor Compaction Results
You cannot enhance what you do not quantify:
- Observe for material displacement or shoving (a sign that you are rolling too hot or too aggressively)
- Search for checking or hairline cracks (signal that rolling is too cold)
- Examine for roller marks that do not disappear (indicate insufficient compaction)
- Employ a straight edge to confirm smoothness
- Carry out density tests as per project requirements
Real-world tip: Photograph and log your rolling pattern and the number of passes. In case there is ever a question regarding the quality of work, documentation is the answer to avoiding headaches.
Step 8: Finish with Final Passes
The final passes you make are what showcase the whole job to the world:
- Do the last passes with the vibration turned off (breakdown rolling only)
- Make sure that no roller marks remain
- Confirm that the surface looks the same all over
- Check that the cross-slope and grade are correct
- Look at the edges to see if they have the right taper and are sealed
Real-world tip: A few operators prefer to do their final pass in the direction of traffic. It produces a minor texture that can increase skid resistance.
Step 9: Clean and Maintain Your Equipment
Proper care will keep the equipment in good condition longer:
- Remove asphalt build-up from the drum right away (if necessary, use diesel fuel or a commercial release agent)
- Grease all fittings as per the manufacturer’s schedule
- After the first 50 hours of operation, check and tighten the bolts
- If possible, keep the equipment inside to avoid rust
- Change the hydraulic filters at the intervals that are recommended
Real-world tip: An unsoiled drum is the best drum. Asphalt buildup leads to less efficient compaction and may lower your machine’s resale value by a few thousand.
Common Mistakes to Avoid
Learn from others’ errors:
- Rolling too few passes: Not enough compaction results in the surface not lasting very long
- Inconsistent overlap: Can cause a strip of road that is weak and will crack first
- Wrong temperature: This is the mistake that happens the most when asphalt is being laid
- Ignoring weather: Never compact if it’s raining or if there is frost
- Poor communication with the paving crew: Coordinate well with the crew for material placement
Safety Considerations for Road Roller Operation
Operating heavy equipment requires constant attention to safety:
- Always wear a high-visibility jacket, a safety helmet, and steel-toed boots at all times
- If there is a need to reverse, or work near a road, then a spotter should be used
- Do not use the machine on slopes that are more than what is advised by the manufacturer
- Ensure that no one is allowed near the roller while it is working
- Know the location of the underground utilities before you do the compacting
- If the weather is hot then you should drink enough water and take breaks so as not to get tired
Quick Summary
Using a roller machine for roads effectively requires:
- Choosing the perfect roller type for your material and work
- Doing detailed pre-operation checks for safety
- Getting the surface ready properly before compaction starts
- Using orderly rolling patterns from edges to center
- Keeping the right speed (2-3 mph) and overlap (6-12 inches)
- Making the correct number of passes (3-5 for asphalt, 4-8 for soil)
- Watching for trouble areas such as joints, edges and transitions
- Measuring compaction density to confirm the results
- Completing the work with static passes to remove surface marks
- Cleaning and maintaining the equipment after each use
Consistency and attention to detail are the main factors that will lead to a successful road compaction. It doesn’t matter if you’re making a new road or just a driveway; the correct use of a roller is what will give you a nice and long-lasting surface that will resist the traffic for years.
We should also point out that the quality of the compaction is the main influence on the pavement life out of almost all other factors. So, be patient, go through these steps and you will make surfaces that will last for a long time.